Windows has included a pretty powerful painting program throughout the years. Paint doesn’t get much love or attention even from Microsoft, but it is right there even in Windows 10. You won’t see it even in All apps unless you look in Windows Accessories, there, in the secondary menu, you find the old goodies.
For a simple program that is older than the hills Paint has an amazing variety of options and it is not always obvious how to accomplish a specific task. Drawing shapes is one of those areas where you might need a bit of help.
The shape tools are right in the middle of the ribbon at the top of the Paint window.

There are 23 shape tools from a simple line to more complex shapes like stars, a heart, and a lighting bolt. They may not all show in the ribbon depending on your window size. There is a tiny scroll bar to help you get to all of them.
Shapes, except for lines, have outlines and interiors. Click on a shape to get started. Define how you want the shape drawn with the Outline and Fill options.

The first two options under Outline are No outline and Solid color. That’s pretty straight forward. The next five, Crayon, Marker, Oil, Natural pencil, and Watercolor select how the outline is to be drawn. Experiment with these if you like.
Below the Outline option is the Fill selector. This defines the interior of the shape. No fill leaves the interior transparent, that is only the outline is drawn. Solid color is just that, uniform, opaque color. The other five option are interesting. These are partially transparent just as you would expect when using those drawing tools, or “brushes”. With the Marker brush you get a uniform, transparent color overlaid on the existing background.
The next tool is Size. That defines the width of the outline.
Now we come to color.

There are two color selectors, Color 1 and Color 2. Color 1 is the foreground color, the main color, it is the color of the outline for shapes. Color 2, the background color defines the shape interior fill color. Click the color selector and then the desired color patch to the right. There are 20 color patches available.
But wait, there’s more!
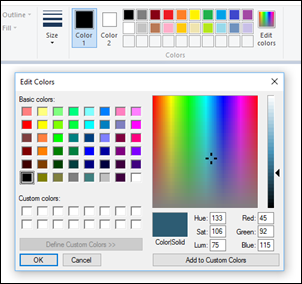
Click Edit colors and you get the full gamut. This allows you to define custom colors. These will become the patches, up to 10, under the 20 normal patches.
You can set a custom color from the larger selection of patches or from the multi-color patch by clicking inside that area. You can adjust the color intensity with the slider at the right. You can also specify the color by entering the numeric values, 0 to 255 in the Red, Green, and Blue boxes or the Hue, Sat, and Lum fields. This allows you set any of 16,777,216 colors.
Now let’s draw a shape
With the preliminaries done let’s get to the shapes. Let’s start with a simple box, a rectangle.  Click the Rectangle icon. Move the pointer into the drawing field. It will now take the shape of a thin cross with a dot in the middle.
 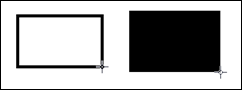 Place the pointer to the upper left corner of the rectangle that should enclose the drawn shape. Press the left mouse button and drag the shape to the right and down. Of course, you can start at any corner position.
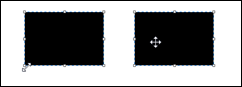 When you release the mouse button the next bit of magic happens. The shape defining rectangle will take on a dashed outline and resizing boxes will show at the corners and the side midpoints. You can resize the shape at will. Move the pointer to the inside and you get the four-pointed “move” pointer. You can now drag the shape to any position you like.
 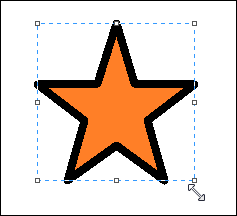 You can even change color and other parameters as long as you do not click somewhere on the outside of the shape defining box. When you are satisfied with your art, click somewhere outside the shape and it is set in place.
Of course, the same procedure applies to any other shape.
One more trick: Hold down the Shift key while dragging the shape to get a square outline for squares or perfect circles.
Well that should do it. Isn’t this simple tool amazing? And we only covered shapes!
© 2016 Ludwig Keck



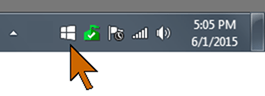 A little Windows icon has appeared in the notification area of the taskbar on PCs operating on Windows 7 (SP1) and Windows 8.1. What is it for?
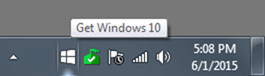 Put your pointer on it and it will bring up a little message saying “Get Windows 10”.