Photo files contain a lot of information besides the image. We generally refer to that as the EXIF data although there is actually a lot more, a better term to use is metadata. Cameras add data about the camera and its settings in an area outside the image data. Smartphones do the same and also add GPS data to show exactly where the picture was taken. The apps used to do post-processing add entries of their own, delete some that are there, and alter some information. We all like to add some tags, comments, titles and descriptions of our own. By the time a photo is ready for sharing on the internet it carries quite a data load.
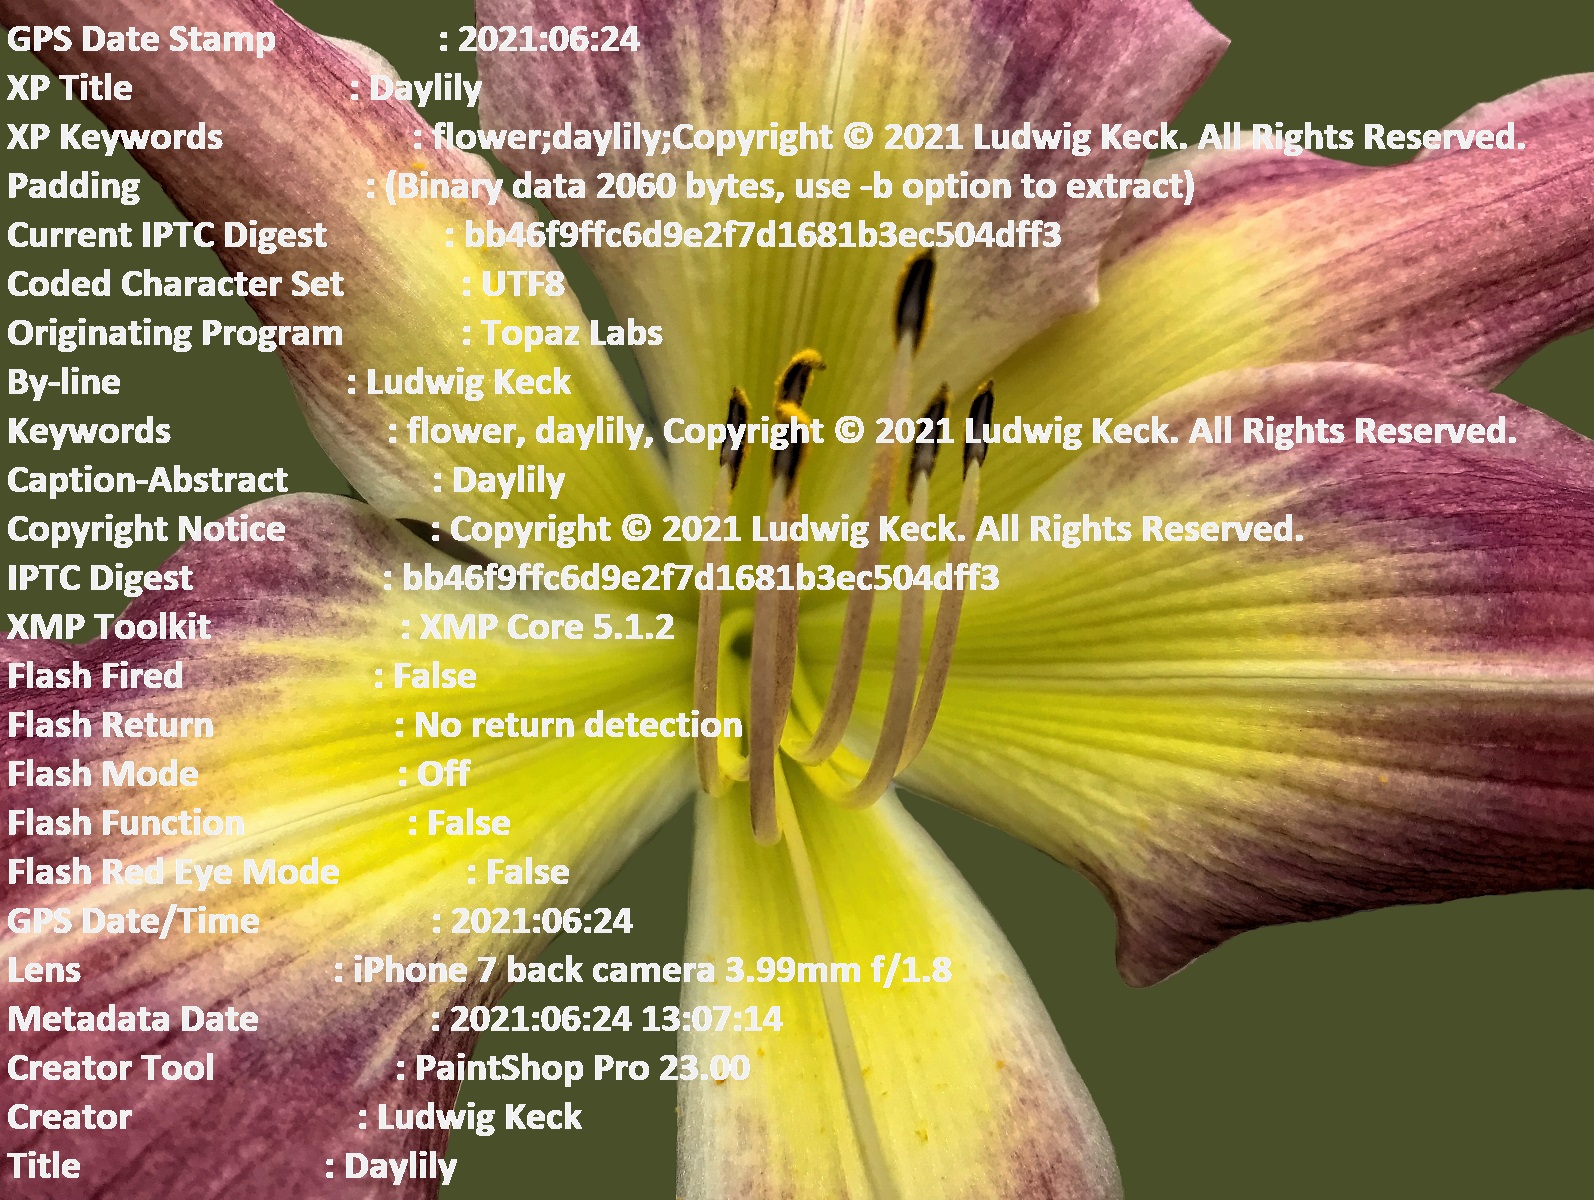
The photo illustrating this post has a small portion of its metadata superimposed. I ran it through several apps and did a variety of processing including removing the background, enhancing the colors, sharpening and noise removal. Then I sized it down for online use. When I was finished the metadata was 10.1 kilobytes in size. How do I know> I use an app called EXIF Tool. That app can list pretty much all metadata that can be found in a file. It can also be used to add or remove data. More on that shortly.
Since much of this data is personal to us it might not be good to share all that on the internet. There are a number of ways to modify the metadata. I will share here just two approaches for removing metadata. I will also limit this discussion to JPG photo files and Windows PCs as the storage and processing devices.
The Windows “Properties” App
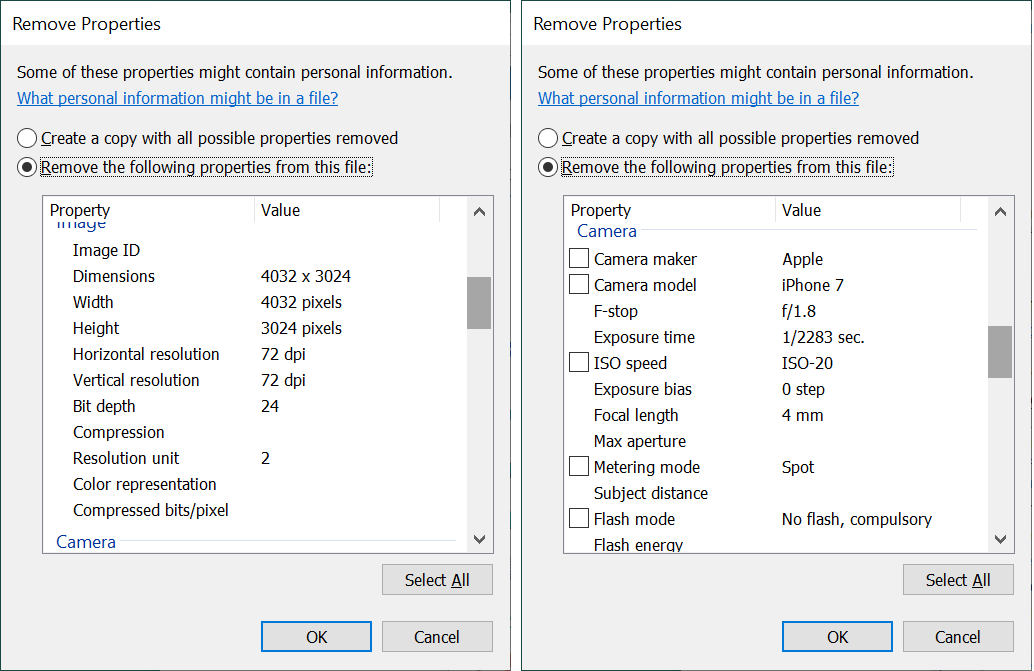
When you right-click an image file a small menu window pops up. The last option is “Properties”. Clicking that choice brings up a small window something like this example shown on the left:

Notice that option on the bottom: “Remove Properties and Personal Information“.
Clicking that brings up another window, as shown on the right above, with options.
The default option is “Create a copy with all possible properties removed“. It turns out that “all possible” is a rather limited promise. When you click the second option, “Remove the following properties from this file:” That allows you to scroll through the many data items. Those that can be removed have a check box in front. There are many other properties that are not listed. Some of the listed options are shown in the illustration on the right above. You can see the other data items for our sample photo in these illustrations.
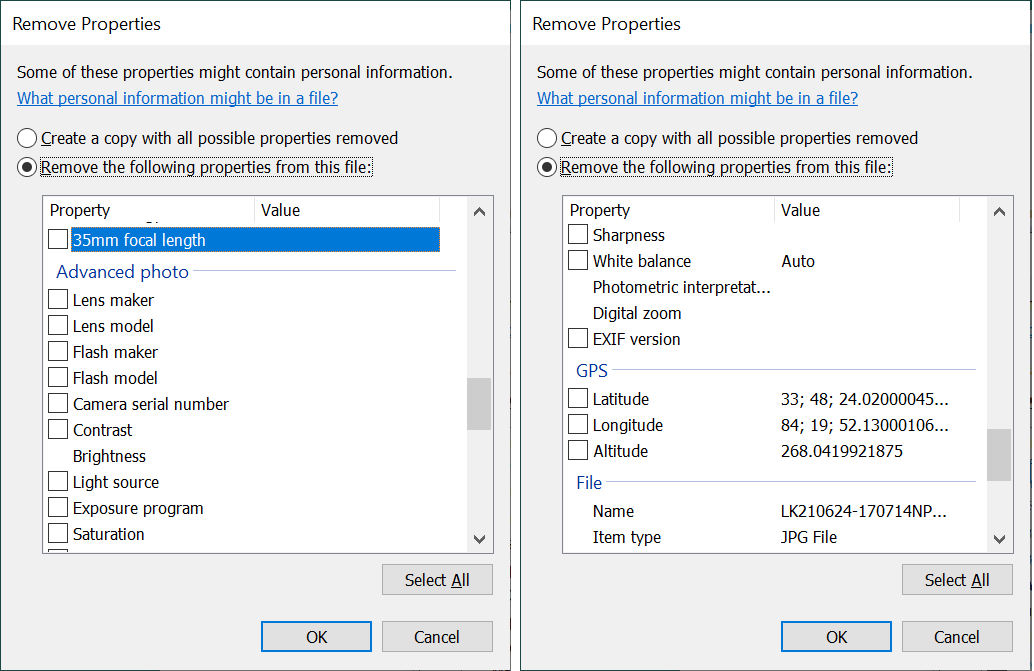
Removing “all possible” data from our sample photo file reduced the metadata to 7.99 kB. Nearly 80% of the data remained in the photo. This method did remove personal information and location data and most of the photo information. What was not removed included all sorts of information generated by the post-processing apps, like a history of all the steps done. You might not want to share all the steps you did in making your photo into your masterpiece. So you might want to remove all that is still in there.
Using ExifTool to remove metadata
The program ExifTool is a very powerful application. There are many option and if you look at the instructions for its use, you will be tempted to throw up your hands. Yes, this tool is for the geeks and nerds, but it can be used by normal humans. You can download the tool from exiftool.org. The downloaded file is a zip file. Move it to a convenient folder and extract the contents (right-click > Extract All).
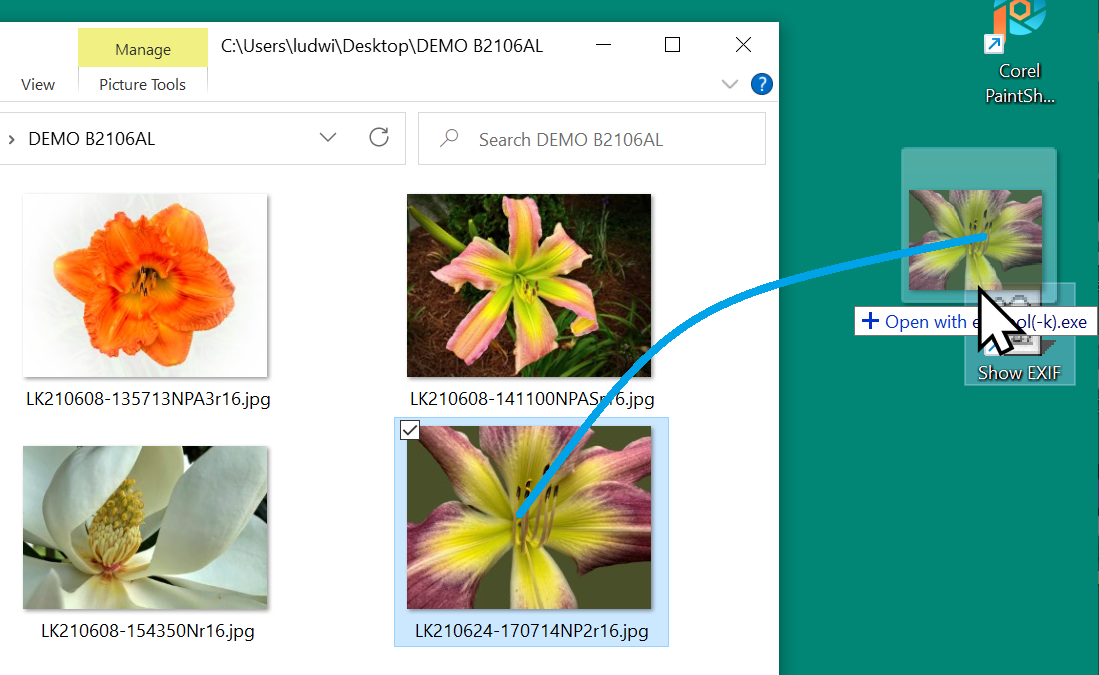
The extracted contents consists of just one file with the strange name exiftool(-k).exe.

Right-click on that file and select Send to, then Desktop (create shortcut). You might want to rename the shortcut something like “Show EXIF“. Really, that all there is too it for the option that shows the metadata in a file. All you need to do is drag the thumbnail from the directory to the desktop shortcut.
The first time you do that Windows will complain. In that window click More Info. In the next window click Run anyway. See the illustrations below.

The tool will run and you will get the listing of the metadata in a CMD window. On subsequent attempts the warning window will not show, the tool will run right away and you will get your information.
So far what I described is a way to see the metadata. To remove it takes another bit of “installation work”.
Installing the Metadata Removal option
Here are the steps for adding a removal tool option. Please follow them carefully.
- Open the folder where you installed ExifTool.
- Copy the file – Ctrl-C.
- On an empty spot in that folder paste the copied file – Ctrl-V.
- Right-click the file copy and select Rename. The file name will be highlighted so you can edit it.
- Rename the file so that the new name is exiftool(-all=).exe
- Make absolutely sure that the new file name is as specified above, including the hyphen and the equal sign.
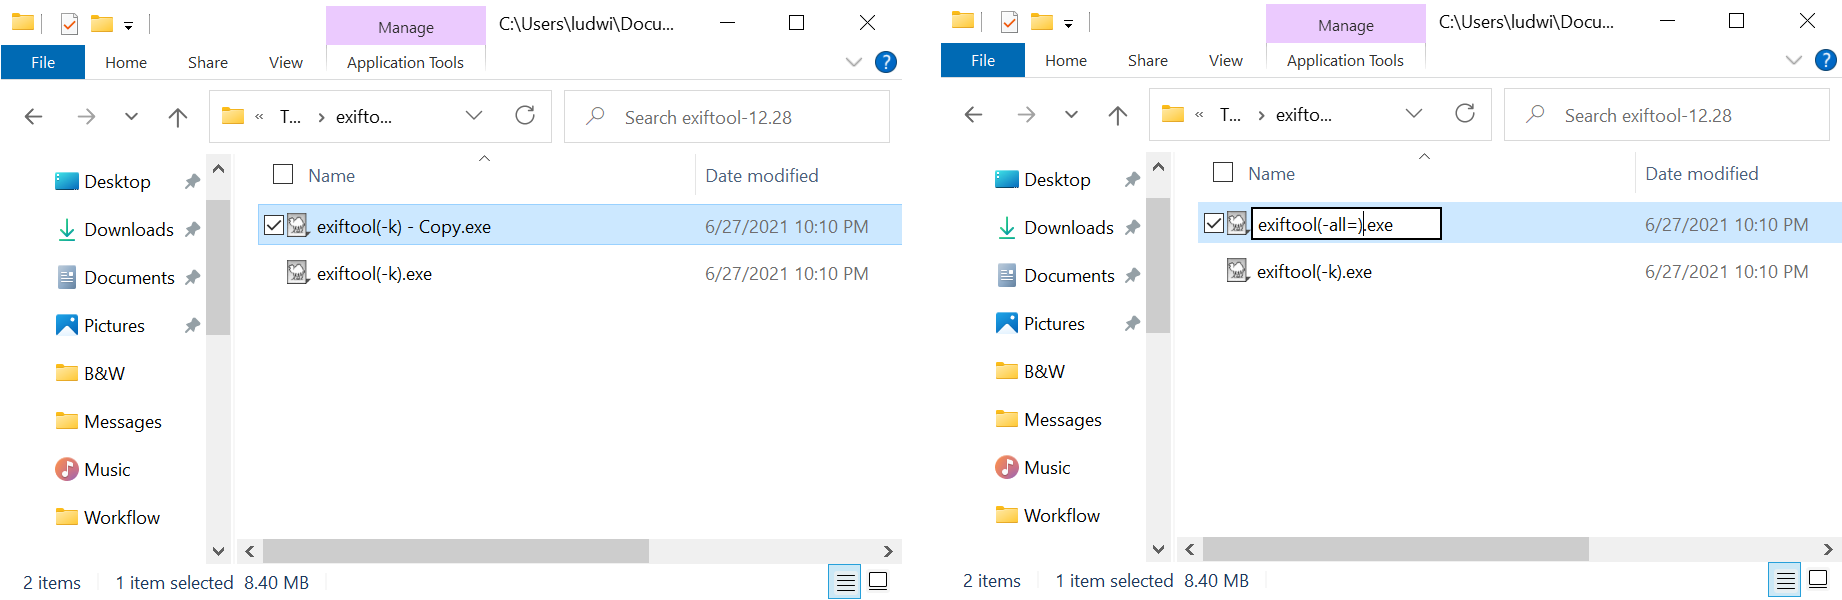
- Make a desktop shortcut just the way you did before.
- Make a folder on the desktop (right-click an empty spot > New > Folder ).
- Give the folder a name like “Remove EXIF“.
- Drag the new shortcut into this folder.
- Rename the shortcut something like “Remove EXIF“.
Do I see your hand raised up trying to interrupt me? You are saying that renaming a file can’t possibly make it function differently? Back in the days of the old bard “a rose by any other name smelled just as sweet”, but in this day and age with very clever programmers, what you have done is indeed changing the function of the file by just renaming it.
You now have an extremely powerful tool that can remove the metadata and leave just enough to allow an image file to still function normally. So let me tell you a little more and also allow me to admonish you.
DANGER – DANGER – DANGER
Using this tool can damage files beyond repair.
- Never remove the metadata from your original files.
- Never remove metadata from RAW files (as produced by your camera).
- Never remove metadata from intermediate post-processing files.
If anybody else, especially a child, has access to your computer, remove this file to avoid catastrophies.
Always prepare copies of your files. Remove the metadata only from final copies.
How do you use it?
- Open the folder with the photos you wish to strip of their metadata.
- Open the folder with the ExifTool for removing the data.
- Drag the thumbnail of the photo over to the ExifTool.
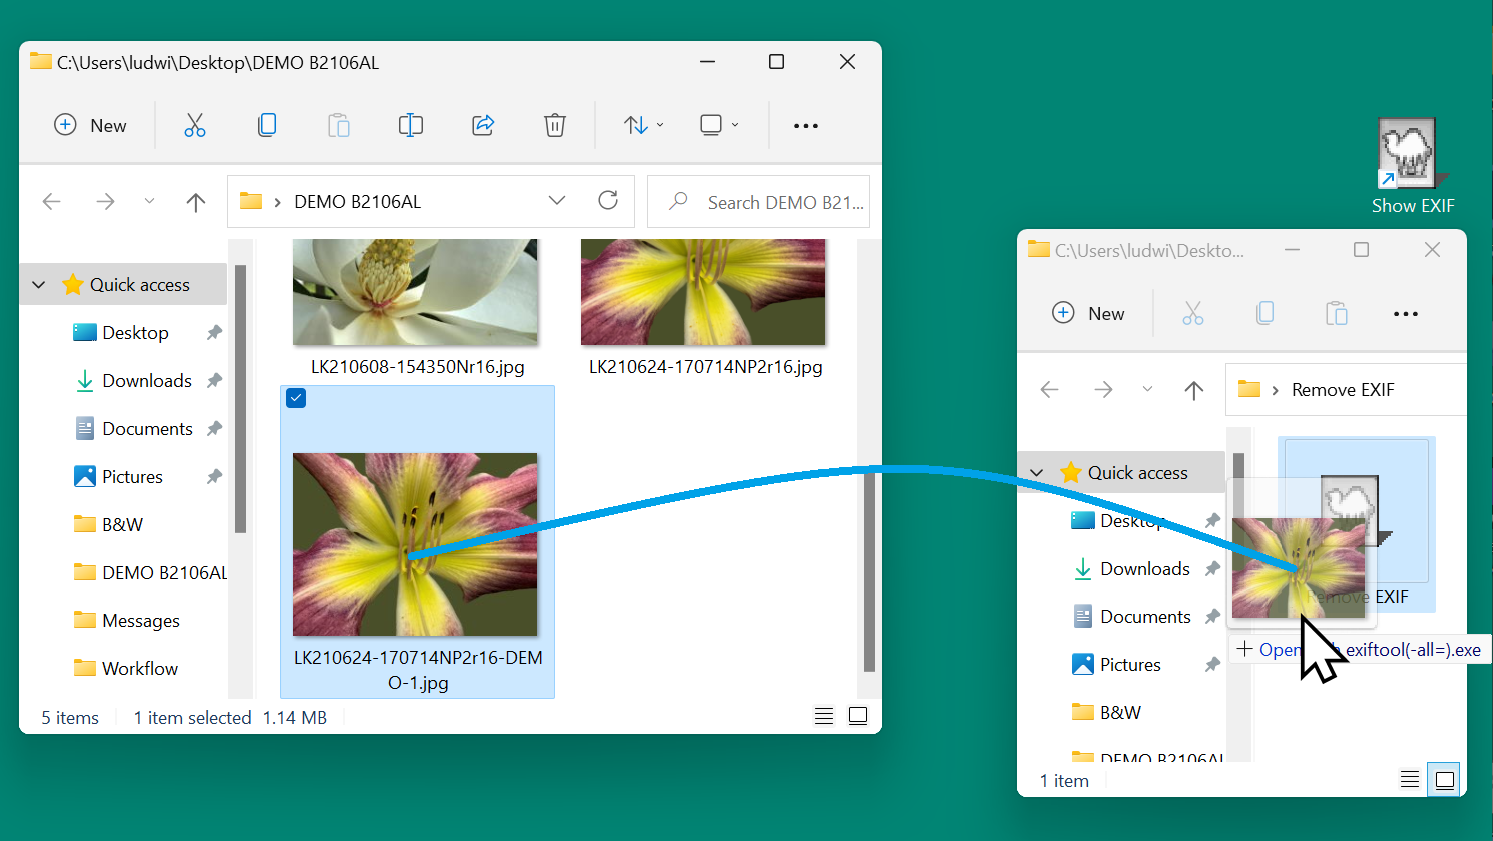
That’s it.
Why do I have you put the removal tool shortcut into a folder? So it takes an extra step and so that you are sure of what you are doing.
When you then drag the photo thumbnail to the viewing tool, you will see what metadata remains. It will look somewhat like this:

Just in case you ignored all my warnings and stripped the data from a photo that you should not have, there is a safety feature. Inspect the screen capture above. Note the added file in the photo folder with the funny name. The ExifTool made a copy of the file as it was before the metadata was removed. It appended “_original” to the filename extension. If you edit the filename and remove that part, what you have is the file as it was before the operation.
Now you can relax and go about removing metadata from photos.
 .:. © 2021 Ludwig Keck


