How do I get to my WordPress Media Library?

Two ways come to mind. Reach in through a window or “walk” in through the dashboard. Sorry about this levity, but really these are routes to your WordPress Media Library. Let’s take the formal path first: Go to your WordPress Dashboard. The way there is by going in your browser to address yourblog/wp-admin, where “yourblog” is the web address of your blog.

If your blog is on WordPress.com, that is, the address is like blogname.wordpress.com, you can access the Dashboard by going to wordpress.com, click My Sites and scroll down to the bottom in the left pane. There click WP Admin.

askludwig-170115-05
askludwig-170115-06a

Notice the red arrow in the illustration above. It shows the URL of your Dashboard when you move the pointer over the WP Admin link.

In the Dashboard click Media in the left pane, or Library in the drop-down menu.

Here you can also see, in the lower left of your browser window, the URL of your Media Library.

Yes, of course, I could have told you about this address first, but it is just a little more complicated, that is longer, and harder to remember.

Your Media Library is the online location where your images, and some other media, are stored for use in your blog posts.

The storage order is by upload. The earliest item is at the bottom of this possibly very big “shoe box”. The most recently uploaded image is at the top.

askludwig-170115-18

Now I did tease with another way to get into your Media Library. It is a little convoluted and not at all intuitive, but for some tasks it is the easier way.

Once again you can start at WordPress.com. Click My Sites, then Blog Posts. Either open to edit an existing post or click Add. This gets you into the online WordPress Editor.

Click the circled plus icon to insert content, and a window to your Media Library opens. You can pick an image to insert into your post, but you can do a number of other tasks. We’ll save those for another article.

askludwig-170115-12

Next question, please.

.:.

© 2017 Ludwig Keck

When I add a photo to a WordPress post, where does it go?

That is really a good question because images do not go “into a post”. askludwig-170114-02
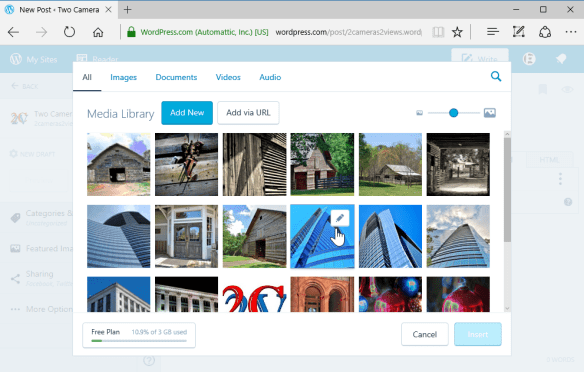
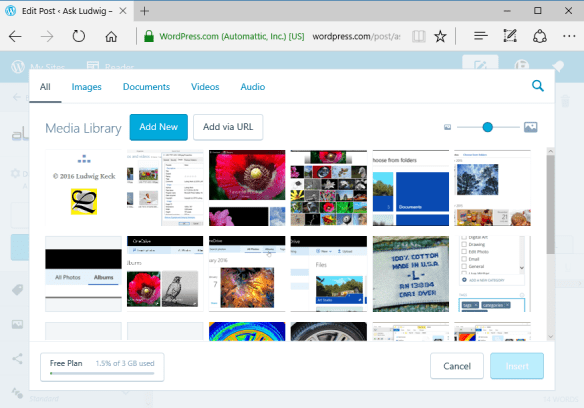
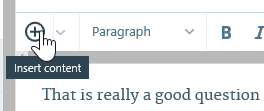
You actually know the answer, you just might not be aware of it. When you prepare a post, starting at WordPress.com, and you click the circled-plus icon to “insert contents”. It opens an overlay that shows your “Media Library“. It will look a bit like this:

askludwig-170114-03

You can click on an image and then you’ll get an “Insert” button. This tells you already that your images are stored in your “Media Library“. If you wish to insert a photo that is on your computer you would click Add New. That opens another window, this time one that shows the files on your computer, and you can select the photo to upload to your Media Library.

As soon as you have selected the image and clicked Open, the file window closes and you are back to the Media Library, but now it shows the newly uploaded photo and it is already selected for you. Just click Insert and it is in your post.

There is another hint in the insert-option window. Take a look at the illustration above once more, but look in the lower left corner. There is tells you how much of the storage space you are using.

With your WordPress blog account you also get 3 GB of storage space. That is where your images are stored. In the “basement” of WordPress, I should probably have said in the WordPress server “cloud”.  If you are using a self-hosted blogging account it is just a bit different since you will be storing your images on servers at your hosting service.

.:.

© 2017 Ludwig Keck

Why do the edits made in Picasa not show in Photo Gallery?

Ah, the ways “Of Mice and Picasa” [*]. How the computer mouse works, you know pretty well, but Picasa, now that is a different creature altogether.

When you make an edit to an image in Picasa those changes are not incorporated into the image file. Well, some are, but for the most part those changes Picasa just stores away for its own use.

Here is an example. Let’s say you have a precious photo of that fine wheel on your motor carriage. To show really what a hot conveyance your vehicle is you apply the Heat Map effect in Picasa.

AskLudwig-160115-01

You want to touch it up in Photo Gallery. Low and behold, the Heat Map effect is not there. The photo looks exactly as it did before.

Let’s look in File Explorer. The photo there does not show the edits either. Indeed, the edits only show in Picasa and not in any other program or app.

AskLudwig-160115-02

See that “picasa.ini” icon in File Explorer? That’s your hint that Picasa does things differently.

But you want to share your Hot Wheel with your friends. What to do?

The solution is easy, but something you have to remember. In Picasa, after you have made any edits, do a “Save As…” and save a copy of the image. That image will have the edits incorporated and they will show properly everywhere.

AskLudwig-160115-03

AskLudwig-160115-04

[*] With all due apologies to John Steinbeck. No offense was intended.

.:.

© 2016 Ludwig Keck

How do I get AutoPlay to import photos from a flash drive?

Normally when you plug in your camera or the memory card the AutoPlay program on your PC will automatically start the photo import routine. If you use an USB drive or adapter this might not happen.

This article provides detailed instructions for checking your PC and setting it up so that the import routine will start when you plug in a USB device or memory card that has photos on it.

This will work on PCs running Windows 7 and earlier versions. This will not work on Windows 8.1 – just forget about AutoPlay on Windows 8.1, it isn’t ready for prime time yet.

First make sure that the external media is recognized.

  • Plug in your USB device or memory card. Listen for the sound that tells you that the PC has recognized something being plugged in.
  • Check Windows Explorer to make sure that the device is listed under Computer.

If this part does not work you have a problem beyond the scope of this article.

Second make sure that AutoPlay is properly set.

  • Click the Start button and type autoplay
  • The AutoPlay program will show up in the start menu already selected (highlighted). Press Enter to start it.
  • Take a look in the AutoPlay window near the top. There is a checkbox with this text: “Use AutoPlay for all media and devices”. If this box is not checked, click it so that it is checked.

image

  • Click the Save button.
  • Now try and see if your external device is recognized and causes AutoPlay to start.

Chanced are that the PC will behave just as it did before and the media does not start AutoPlay.

To get your PC to start AutoPlay for an USB device or memory card you will need to do a bit of “brain surgery”. What we will do next is to modify a setting in the “registry”. Read this article through first. If you are reluctant to dig this deep into the inner workings of your computer don’t feel bad. Things can go wrong and it is possible to do harm. This is brain surgery on your PC. Just get an expert friend to help you, or take your machine to your friendly computer shop.

If you feel that you can handle the process go ahead and “scrub in”.

Setting your PC to start AutoPlay for USB or other devises

imageHere are step by step instructions with illustrations along the way to guide you.

  • Click the Start button and type regedit
  • In the Registry Editor window click the Edit link.

  • In the dropdown menu click Find…

There will be an additional Find dialog window.

  • In the text entry box type NoDriveTypeAutoRun

image

  • Click Find Next

You will see a message “Searching the registry” – it will take a while to complete this search. When the search is finished you will see something like the illustration below.

image

There will be an entry that we searched for and it will be selected (highlighted).

  • Double-click on the highlighted entry.

A new little dialog window will come up.

image

The “Value data:” will likely be “ff” as shown in the illustration. The value will be selected so you can cjange it by just typing the new value.image

  • Type 91 as the new value.
  • Click OK

The change dialog will close and the new value, 0x00000091 (145) will show in the registry data area.

  • Close the Registry Editor

That’s it. You have completed the brain surgery. You can take of your mask now, smile at the nurse and go on to the next details.

Final details

  • Restart your computer
  • When the computer has come up, plug in your device

imageNow momentarily after the beep you should see the AutoPlay dialog.

  • Cheer, clap your hands
  • In the AutoPlay dialog click the checkbox “Always do this for pictures:”
  • Then click Import pictures and videos using Photo Gallery

There may be a number of other option as illustrated here. Yours will be different from mine. The important thing to remember is that the Photo Gallery importer is the very best one available. None of the others do as good a job, give you the variety of options, or make it as easy.

After you click Import pictures and videos using Photo Gallery the normal import process will start. It will start that way in the future whenever you plug in your device.

If this solves your problem, do me a favor and let me know with a comment below.

.:.

© 2013 Ludwig Keck