Part 1 – Using the WordPress.com online editor
Photos in blog posts enhance the appearance, convey information that couldn’t be said in a thousand words, and act as magnets to pull the attention of readers to the story. All blogging editors provide a means of inserting pictures. When the item to be inserted is an image that resides already somewhere on the internet and its web address, properly termed its URL, the procedure it not so obvious.
Bloggers know that to embed an image in a post requires a bit of HTML code. Few of us are fluent and can just switch over to “Text mode” or “HTML mode” and type away.
If you are a WordPress blogger and use the online WordPress editor, I have good news for you. The WordPress editor provides the simplest possible way: Just paste in the URL where you want the image. Yep, it is that easy.
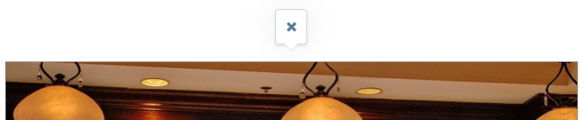
When you paste in the URL it shows as the text that it is, but a moment later the text is replaced with the image. I did this here, the URL on my clipboard was this:

Less than a second after pasting the URL it was replaced with the photo:

WARNING:
 If you are using the online editor at WordPress.com clicking the circled-plus, “Insert content”, option brings up the Media Library to permit choosing an image from the pictures there. On that page there are also to other options, Add New and Add via URL. Add New provides the process for uploading from your device.
You would think that Add via URL is used for embedding an image, the process we are talking about here. Not so! Add via URL places a copy of the image into your Media Library.
You may not want to store a copy of the image, indeed, you might not have permission to copy the image, just to use it in your blog.
Let me repeat the procedure to insert an image with the URL
- Get the URL of the image into your clipboard. For how to do that see: How do I get the URL of an image in my WordPress blog?
- Click on the place in the post where the image should go.
- Paste the URL. On a Windows machine pasting is done with Ctrl+V, Command+V on an Apple device.
Next it gets a bit sticky
The image inserted by pasting the URL will be content-wide, that is the full width of your blog. What if you want it smaller and to one side or the other, like the illustration above?
Click on the image in hope of getting edit options and all that appears is a delete-X.
If you are happy with the full width picture, you are all set, but if you wish for more options you can switch to the more powerful Dashboard editor.
Save your draft, if you hesitate WordPress does it for you. Click My Sites, scroll down in the left pane and click WP Admin.
Part 2 of this mini-series covers Using the WordPress Dashboard editor.
© 2017 Ludwig Keck

