Is there a way to send SkyDrive albums as slide shows?

Yes, you can send links to existing SkyDrive albums or slide shows at any time. Here is the procedure:image
Sign in to your Windows Live account (live.com).

Go to Your albums.

Select the album you wish to share.

Click Share on the menu bar.image
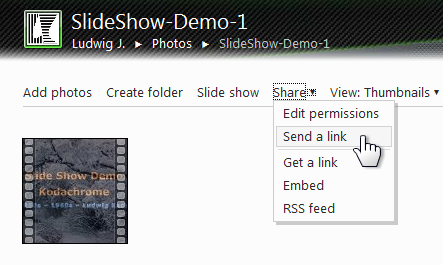
Click Send a link on the drop-down menu.

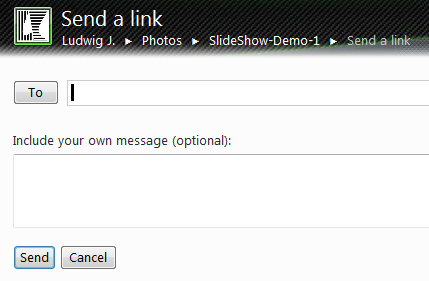
This will bring up a window with an address entry box and a message box. Enter the recipients email address and also enter any message that you wish to accompany the link.

The dialog looks like this:
image

You can enter multiple addresses to send the link to any number of recipients.

NOTE: If your album sharing is set to Everyone (public) the recipients will not need to sign in with a Windows Live ID.

If the album is set to one of the other sharing options, the recipient will need to sign in using the email address, the one you use in sending the link, as the Live ID. If the recipient does not have that address set as a Live ID it can be done from the sign in page. 

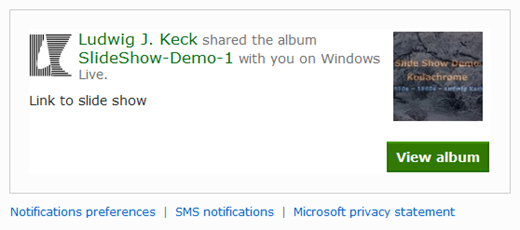
The recipient receives an email with this type of message:
image

When the recipient clicks View album a browser window is launched and the slide show comes up.

If the slide show was prepared with Windows Live Photo Gallery > Slide show > Share slide show > SkyDrive a movie of the slide show will be uploaded to SkyDrive. This will be a “My movie.wmv” file created by Live Movie Maker. The email link will start the slide show and play it through.

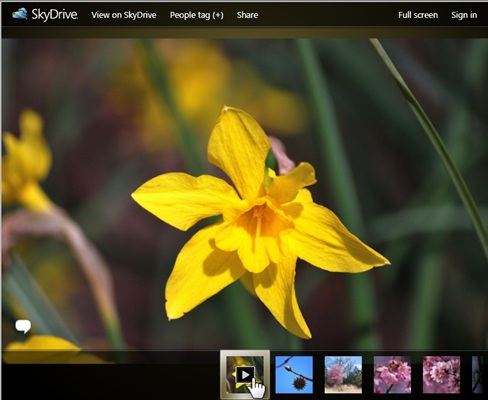
If the link is to an album of individual picture files, the link will start with the first picture. The recipient needs to click the “play” button to play the slide show. See illustration here:
image

.:.


Where are the thumbnails stored for a post with a SkyDrive album?

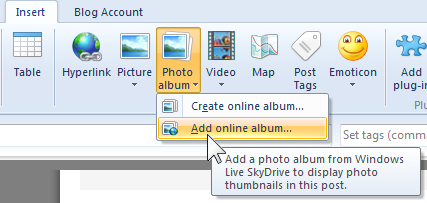
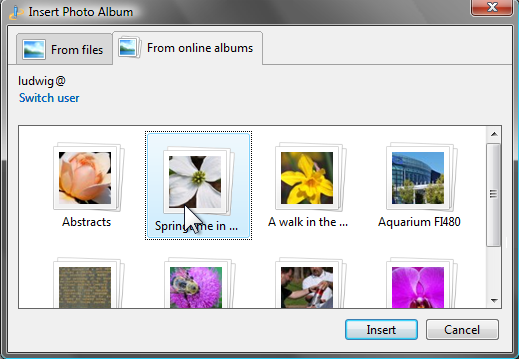
Windows Live Writer has an insert option for adding a SkyDrive album to a post. When Add online album is selected, an “Insert Photo Album” dialog opens. It may ask for a sign in before showing all the albums on your SkyDrive. Click an album icon and thenimage click Insert to get the process started. Live Writer downloads the pictures from the album in order to create the graphics. An example of a SkyDrive album is shown at the end of this post.

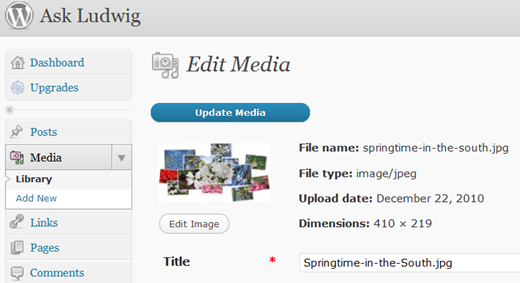
Live Writer creates a folder for the downloaded images and newly created thumbnails on your boot drive under Users\yourname\AppData\Local\Temp\WindowsLiveWriter-xxxx. imageThe album will be shown by a collection of thumbnails, the album title, and a couple of hyperlinks. A new “Photo Album Tools” Ribbon tab is available whenever the album art is selected. The most useful and interesting tools are in the Album styles section of the tab: A half dozen layout styles are shown. The first, default, layout, shows the thumbnails the same way as pictures are shown in a photo email. Two other layouts show the pictures in a flat imagearrangement, the remaining three show randomly oriented little pictures. The thumbnails can be rearranged with the “Shuffle photos” tool. Just click on this command and observe the new arrangement. Continue until you are happy with the presentation. When the post is published to your blog, the created display pictures are uploaded to the blog image store. imageIn this case, this being a WordPress.com blog, the images wind up online in the blog’s Media Library. If one of the random display options is selected this will be one image of the entire arrangement. For the other three layouts, Squares, Grid right, and Grid left, the individual thumbnails are uploaded to the blog media library.

As you would expect, Windows Live Writer does a fine job of cleaning up after itself. In the case of this post, the temporary store contained over 3 GB of material. Once the post has been published this folder is emptied and removed.

Now, aren’t you glad you asked? This allowed me to tell you a little about how Windows Live Writer offers another really nice feature and does a great job of managing it.

Here at last is the demo album. Enjoy!


What is the difference between Office, Photos, and SkyDrive?

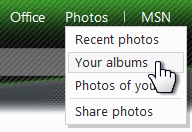
When signed in to Windows Live, the menu bar at the top provides access to Hotmail and Messenger and to the user’s SkyDrive. The individual commands provide access to the documents or photos portion.

image

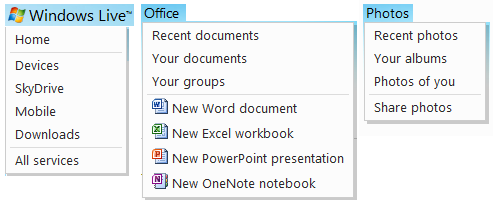
Each of the commands also provides a drop-down menu to select the specific item or task desired. Clicking on the “Windows Live” title also presents a menu. The menus are shown here.

image

Under the Office command the documents and document folders can be reached. From Photos the albums can be displayed. When SkyDrive is clicked (left menu) all of the items on the SkyDrive are shown.

The different option just provide for quick access to the items of interest, there is no other difference.


How can I see my SkyDrive photos in Windows Explorer?

You Windows Live SkyDrive photos are stored “in the cloud” on Microsoft servers. Normally you access them through a browser like Internet Explorer.

It is possible to map a SkyDrive album to a drive letter in Windows Explorer. Then you can see what photos you have stored in that album.

NOTE: This method works in Windows 7. Windows Vista also supports mapping with this procedure, other operating system do not, sorry.

Here is how:

Obtain your Windows Live account “cid” number. Once you have that you may want to save it in a file for future use.

  • Sign in to you Windows Live account by going to home.live.com.
  • Click on profile underneath your name in the upper right.

The address in the browser address window contains your “cid” number. It is the number following “cid-“ up to the next period (“.”) as shown highlighted in this example:

image

Of course, the number will be your own unique number, not mine as shown here.

  • Copy this number for later use.
  • Get the name of the SkyDrive album that you wish to map.

Next proceed on your computer.

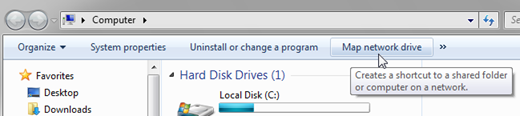
  • Click Start – Computer. Windows Explorer open showing your drives.
  • On the menu bar click Map network drive.

image

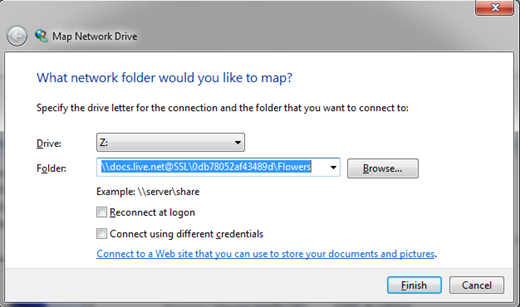
A “Map network drive” dialog opens.

  • Select the drive letter you wish to use. By default the selection is the highest drive letter available, normally Z:.
  • In the Folders box enter this text (without the quotes) “\\docs.live.net@SSL\” ,followed by your cid number, followed by a back-slash, followed by the album name.

image

  • Click Finish.

imageimage

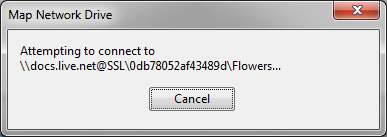
You will see a “Map Network Drive” dialog. It may take a while for this process to complete.

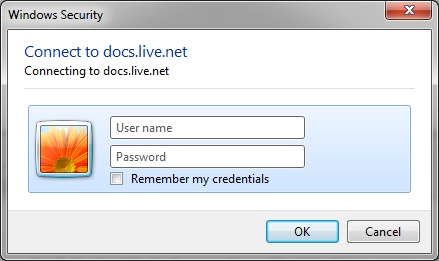
When the “Windows Security” dialog opens enter your Windows Live ID – the complete email address and your password.

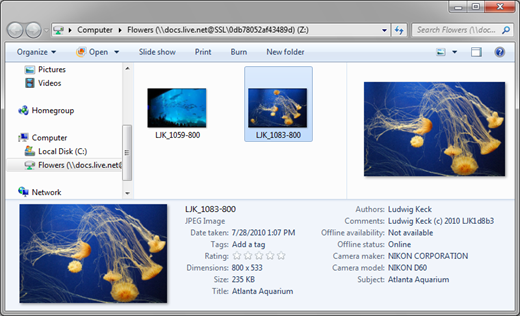
After another delay a new Windows Explorer window opens showing your SkyDrive album (as illustrated here).

image

You can see thumbnails of your photos and you can see the properties of a selected photo in the properties pane.

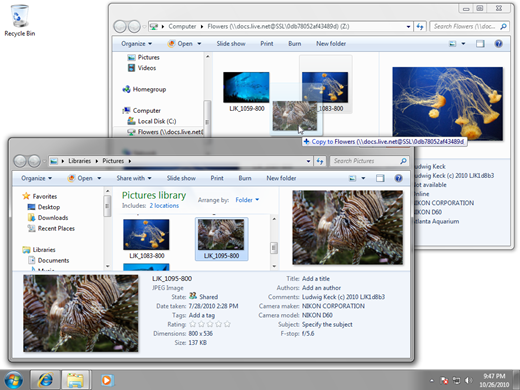
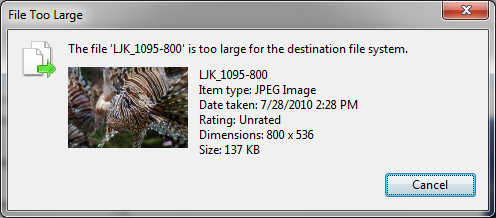
Can you use this mapped folder like any other? Alas, at the present time (October 2010) when you drag a photo to this folder it seems to work at first. Then you get an error message.

image

imageThe error message may say that the file is too large, regardless of how small it actually may be. Maybe soon Microsoft will enable the functionality that is so close to reality.

For now you will have to settle for just seeing your photos in the album. Use Windows Live Photo Gallery to upload photos to the album (see: How do I upload photos to SkyDrive using Windows Live Photo Gallery?) or upload from the SkyDrive side (see: How do I upload photos to SkyDrive?)