How do I get to my WordPress Media Library?

Two ways come to mind. Reach in through a window or “walk” in through the dashboard. Sorry about this levity, but really these are routes to your WordPress Media Library. Let’s take the formal path first: Go to your WordPress Dashboard. The way there is by going in your browser to address yourblog/wp-admin, where “yourblog” is the web address of your blog.

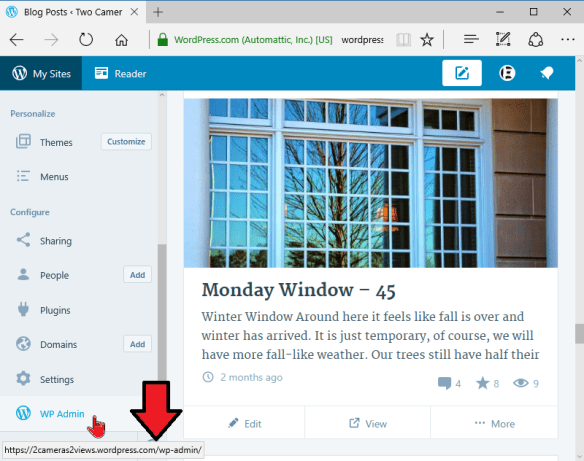
If your blog is on WordPress.com, that is, the address is like blogname.wordpress.com, you can access the Dashboard by going to wordpress.com, click My Sites and scroll down to the bottom in the left pane. There click WP Admin.
askludwig-170115-05
askludwig-170115-06a

Notice the red arrow in the illustration above. It shows the URL of your Dashboard when you move the pointer over the WP Admin link.

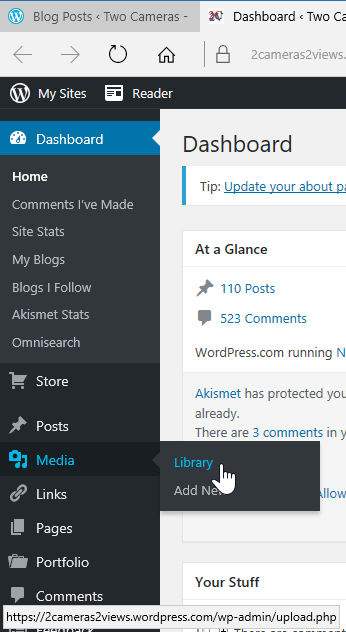
In the Dashboard click Media in the left pane, or Library in the drop-down menu.

Here you can also see, in the lower left of your browser window, the URL of your Media Library.

Yes, of course, I could have told you about this address first, but it is just a little more complicated, that is longer, and harder to remember.

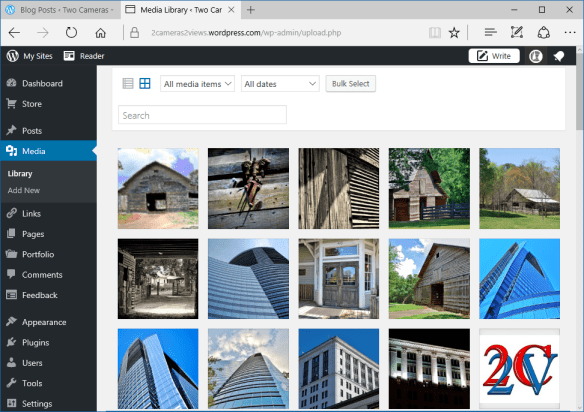
Your Media Library is the online location where your images, and some other media, are stored for use in your blog posts.

The storage order is by upload. The earliest item is at the bottom of this possibly very big “shoe box”. The most recently uploaded image is at the top.
askludwig-170115-18

Now I did tease with another way to get into your Media Library. It is a little convoluted and not at all intuitive, but for some tasks it is the easier way.

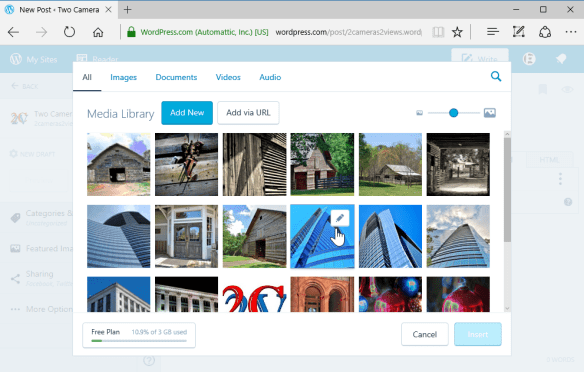
Once again you can start at WordPress.com. Click My Sites, then Blog Posts. Either open to edit an existing post or click Add. This gets you into the online WordPress Editor.

Click the circled plus icon to insert content, and a window to your Media Library opens. You can pick an image to insert into your post, but you can do a number of other tasks. We’ll save those for another article.
askludwig-170115-12

Next question, please.

.:.

© 2017 Ludwig Keck

When I add a photo to a WordPress post, where does it go?

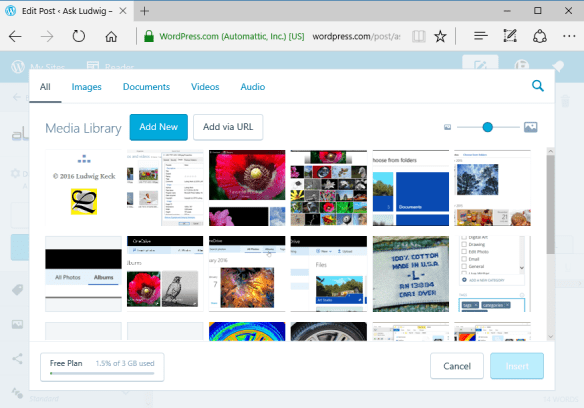
That is really a good question because images do not go “into a post”. askludwig-170114-02You actually know the answer, you just might not be aware of it. When you prepare a post, starting at WordPress.com, and you click the circled-plus icon to “insert contents”. It opens an overlay that shows your “Media Library“. It will look a bit like this:
askludwig-170114-03

You can click on an image and then you’ll get an “Insert” button. This tells you already that your images are stored in your “Media Library“. If you wish to insert a photo that is on your computer you would click Add New. That opens another window, this time one that shows the files on your computer, and you can select the photo to upload to your Media Library.

As soon as you have selected the image and clicked Open, the file window closes and you are back to the Media Library, but now it shows the newly uploaded photo and it is already selected for you. Just click Insert and it is in your post.

There is another hint in the insert-option window. Take a look at the illustration above once more, but look in the lower left corner. There is tells you how much of the storage space you are using.

With your WordPress blog account you also get 3 GB of storage space. That is where your images are stored. In the “basement” of WordPress, I should probably have said in the WordPress server “cloud”.  If you are using a self-hosted blogging account it is just a bit different since you will be storing your images on servers at your hosting service.

.:.

© 2017 Ludwig Keck

How do I import just certain photos from my camera to my computer?

Microsoft Photo Gallery provides a very flexible import tool. For the easiest way to use this tool, first set up your computer to launch it when you connect your camera. Check this post for instructions on setting up your computer: How do I import photos from my camera to my Windows 7 computer? 

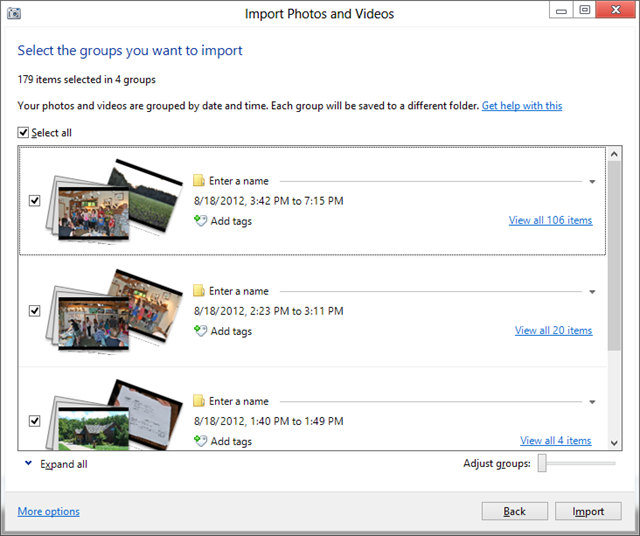
To specify just the photos that you wish to import use the options in the import dialog. When the dialog opens the photos on your camera are shown in groups by the time/date the photos were taken. Import-09The groups that you have not yet imported are checked. Note the Select all option above the listings.

Click this several times to select all or to unselect all. You want them all unselected.

If you do not want the imported photos to be placed into multiple folders, adjust the Adjust groups slider all the way to the right. You will see the results in the main area.

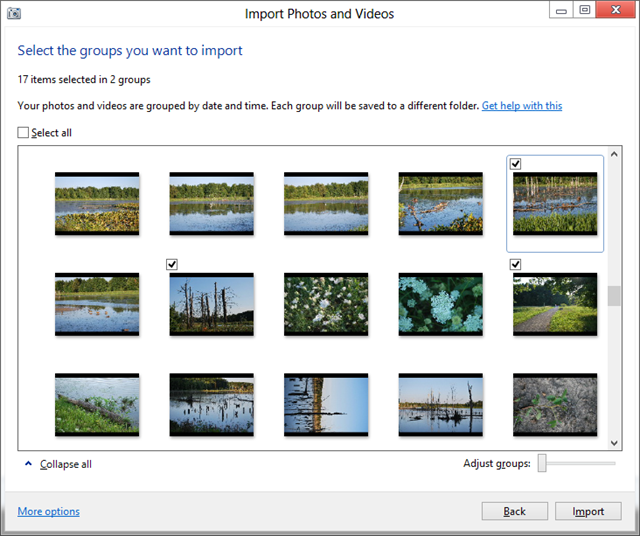
Click the View all xx items link on the right of the listing to show thumbnails of all photos.

Now proceed through the thumbnails and select the photos you wish to import. Selecting works just as you expect. Click to select, click again to unselect.Import-14 

Note that the number you have selected is shown. You may have to scroll down and up if there are a lot of photos on your camera.

When you have made your selections click Import to complete the task.

.:.

© 2012 Ludwig Keck

LiveWriter-credit-360

Can I re-import photos when the computer says no new photos were found?

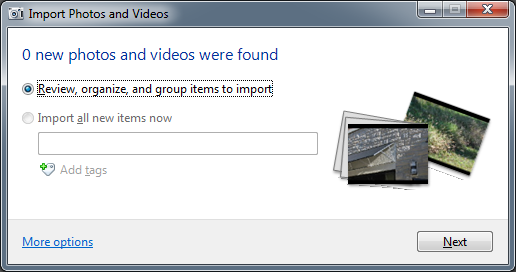
On occasion you will get a dialog that says “0 new photos and videos were found” when you try to import pictures from your camera.Import-01 This happens if you already have imported those photos, even though you might have deleted or moved the pictures on the computer.

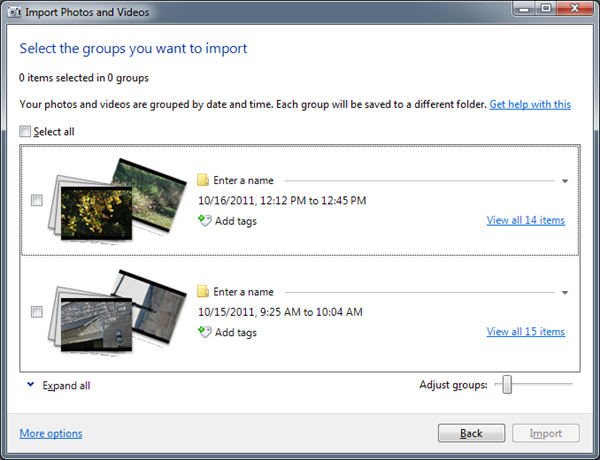
Can you re-import the photos? You can, provided that you did not erase them on the camera. We are assuming here that you have set up your computer to use Windows Live Gallery to import photos from your camera. Just click the Next button (see illustration). In the next window you will see the photos on your camera arranged by date. It will say “0 items selected in 0 groups”. Note that the check box in front of the groups is not checked.

Import-02Import-03

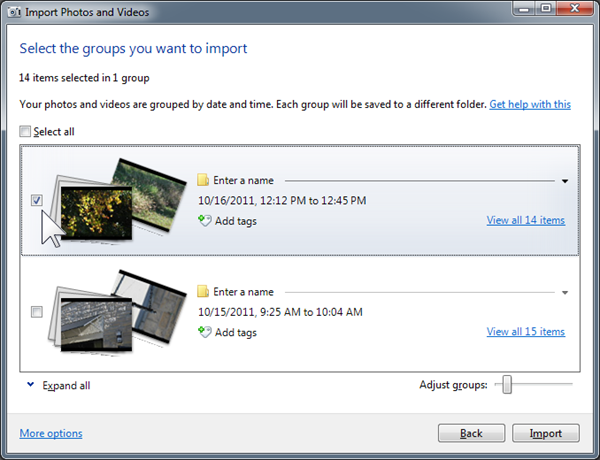
Click on the group check box that you wish to import again. There is also a “Select all” option. Make sure you have selected just the ones you wish to import once more. Click Import and the process starts.

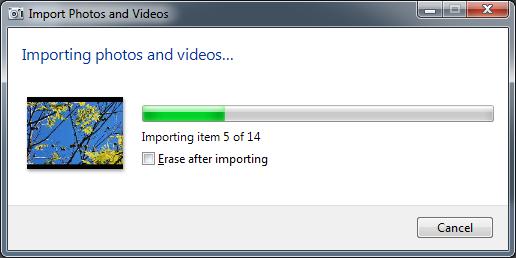
Import-04While the photos are being imported you will see the progress in a dialog like the one shown here. Note the check box with the legend “Erase after importing”. This means “erase from the camera after the photos have been imported to the computer”. I always leave that unchecked, which is also the default. This way the photos stay on the camera.

So what happens if you already have the photos on your computer? A new set will be imported, if the file name already exists, the import process will add a number in parenthesis at the end of the file name for the new file. You will wind up with duplicated photos. No harm will be done to photos that are already on your computer. Of course you can delete the duplicates.

.:.

© 2011 Ludwig Keck