My desktop shortcut icons are gone. How do I get them back?

This is a not uncommon problem. How it happens I can’t say, but how to get them back is easy.

Before I show you how to restore the shortcut icons, here is how to make them disappear:

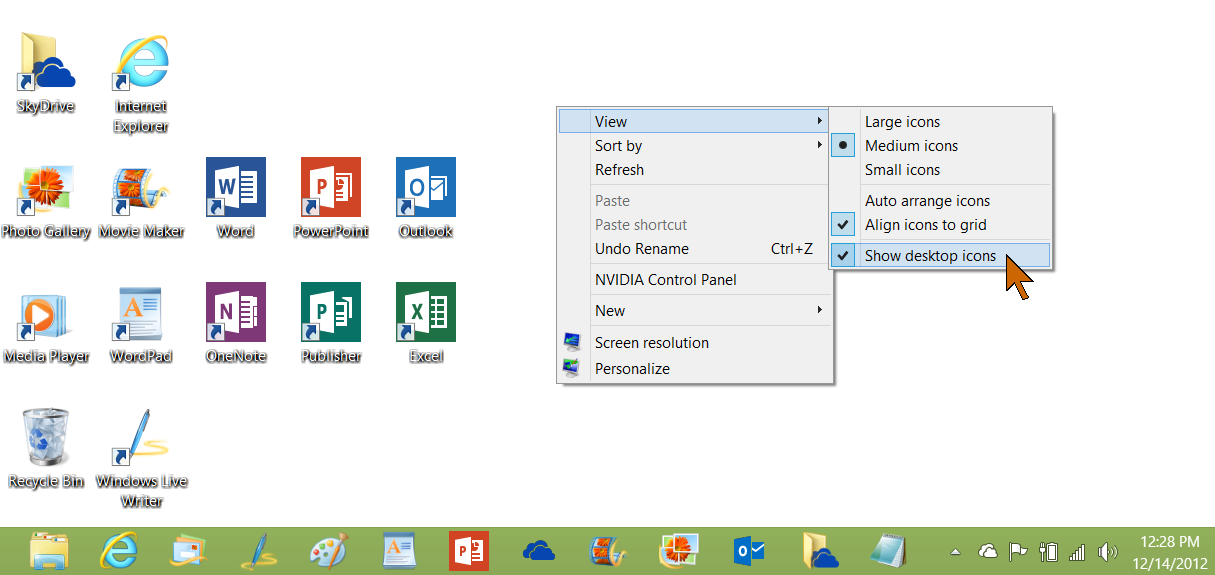
  • Right-click on an empty spot on your desktop.
  • In the small menu move the pointer to View…
  • Move the pointer horizontally to the additional menu.
  • Move the pointer down to Show desktop icons. This item is checked when the icons are displayed. Click it so it will be unchecked.

The icons will immediately disappear.

Icons-3

To restore the desktop shortcuts just follow the same procedure.

  • Right-click on the desktop.
  • In the small menu move the pointer to View…
  • Move the pointer horizontally to the additional menu.
  • Move the pointer down to Show desktop icons. This item is unchecked when the icons are not displayed. Click it so it will be checked.

The desktop shortcut icons will be restored.

Icons-4

My own icons have never pulled the disappearing act, and I did not know about this. I am indebted to my friend AlexO for this solution.

.:.

© 2012 Ludwig Keck

LiveWriter-credit-360

Can multiple SkyDrive Desktop Apps be used in Windows 8?

SkyDrive has been thoroughly integrated into the fabric of Windows 8. The SkyDrive desktop app brings access to SkyDrive right into File Explorer – Windows Explorer of prior Windows editions. An earlier post, from before Windows 8 was released, shows a method for providing access to multiple SkyDrive accounts (Can I install multiple SkyDrive apps on my desktop?). That method works just fine in Windows 8. This article expands on that and provides some additional information.

Only one instance of the actual SkyDrive desktop app can be installed, however, shortcuts to SkyDrive folders of other users of the PC can be placed on the desktop. The illustration here shows access to three SkyDrive folders simultaneously.

image

First a review on setting up the PC.

  • Set up a user on the PC for each SkyDrive, that is for each Microsoft account. Set up the SkyDrive desktop app for each user on their respective desktop. Leave the users signed in at all times.
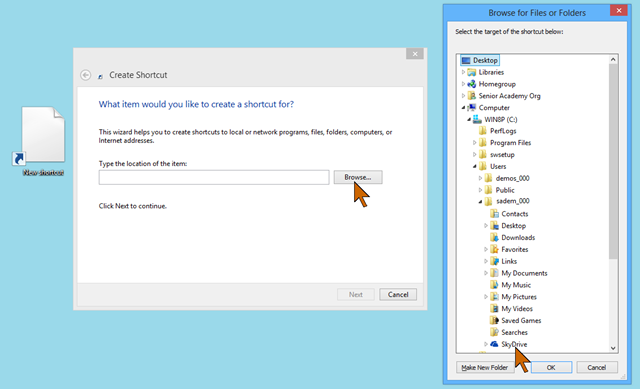
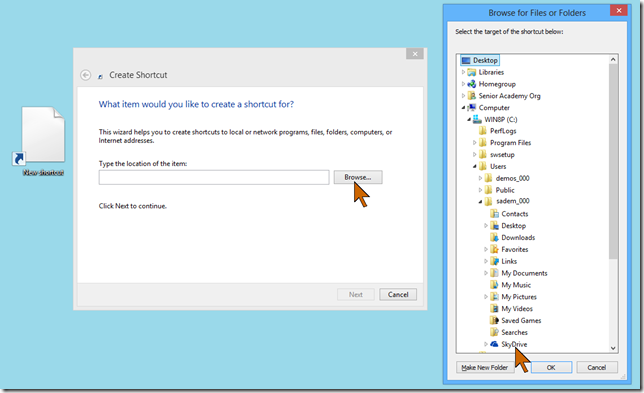
  • On the primary user’s desktop right-click on an empty spot; click New, then click Shortcut.
  • In the Create Shortcut menu click Browse the navigate to Computer > Users > other user. Click on SkyDrive (in the expanded list for the user).
  • Click OK, then Next. Give the shortcut an appropriate name then click Finish.
  • Repeat for the other users.

You may have to give permission to proceed during these steps.
image

All normal tasks can be done in these folders – copy, move, delete, paste – just as in any other folder. The difference is that any changes in these SkyDrive folders will be synced with the SkyDrive in the cloud and the SkyDrive folders on other PCs, smartphones, etc. Of course, you need to be connected to the Internet for synchronization to take place. If you are not connected to the Internet, you can still make any changes like any other folders in File Explorer. When a connection is restored, the syncing will take place in the background.

imageLimitations:

There are some limitations with this arrangement. You can see the sync status symbols only on the local SkyDrive folder (the check mark indicates that the item is up to date). There is no indication that another user is signed out and thus the changes will not be synchronized.
imageYou cannot make changes to which folders should be included in the local SkyDrive folder. Such changes have to be made on the respective user’s desktop.

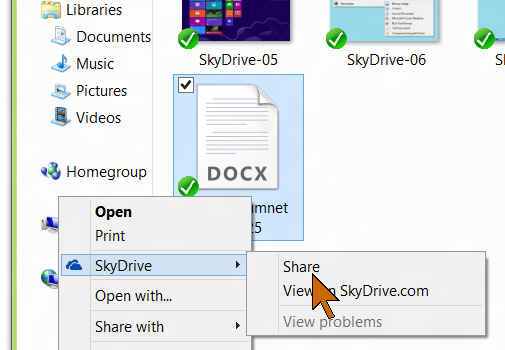
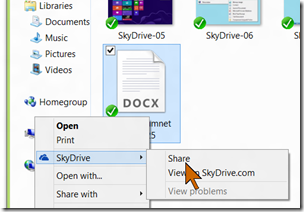
You cannot initiate sharing in the folders for the other users, you can do this only in the primary SkyDrive folder.

When rebooting the PC you need to sign in each user.

These are relatively minor inconveniences compared to the ability to easily access several SkyDrive folders on the same desktop.

.:.

© 2012 Ludwig Keck

LiveWriter-credit-360

How do I choose the SkyDrive folders to sync with the desktop app?

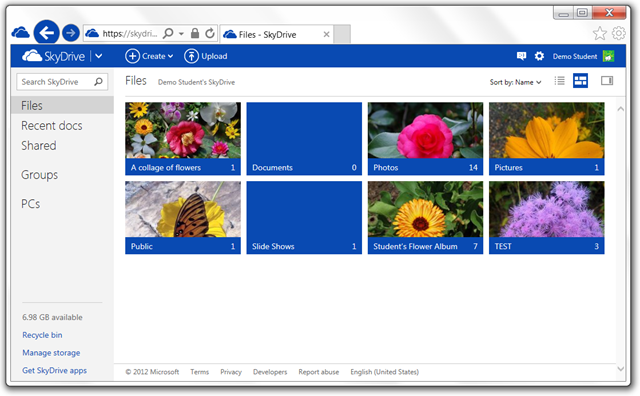
The SkyDrive desktop app by default syncs, that is, copies to the computer, all folders in SkyDrive. If you do not wish to replicate all folders, you can choose which to sync. Here is how:

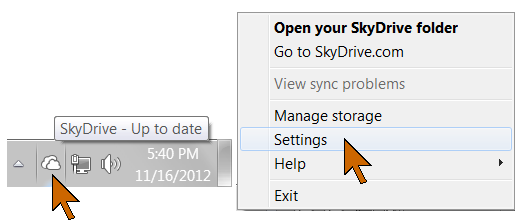
  • imageRight-click the SkyDrive icon in the notification area.
  • Click Settings in the small menu.
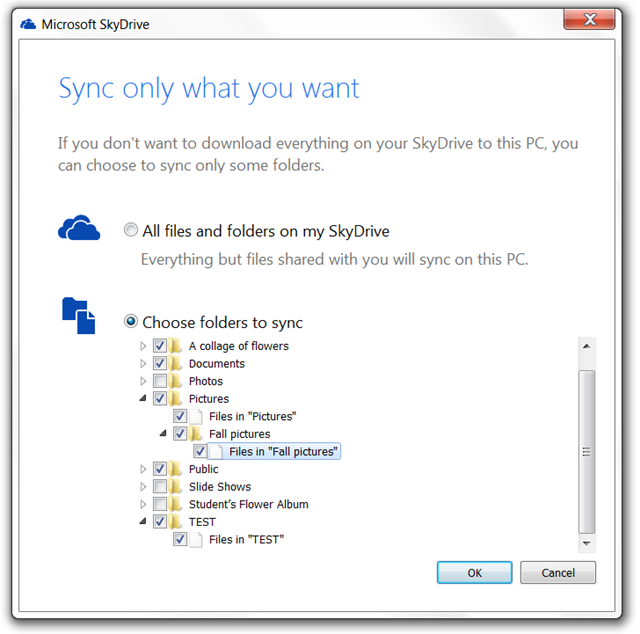
  • Click the Choose Folders tab
  • Click the Choose Folders button.

The SkyDrive folders will now be displayed with checkboxes in front. Uncheck the folders that you do not want replicated on your computer in the SkyDrive folder.

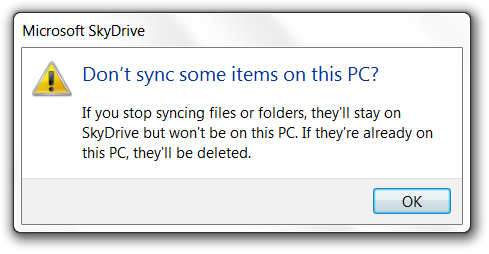
SkyDrive-sync-05The first time you do this you will see a notice as shown here. It says:

If you stop syncing files or folders, they’ll stay on SkyDrive but won’t be on this PC. If they’re already on this PC, they’ll be deleted.SkyDrive-sync-12

You can select root folder or sub-folders as you like.

  • Make the selections. Checked folders will be synced.
  • Click OK and click OK in the prior dialog.

The changes will be made momentarily.

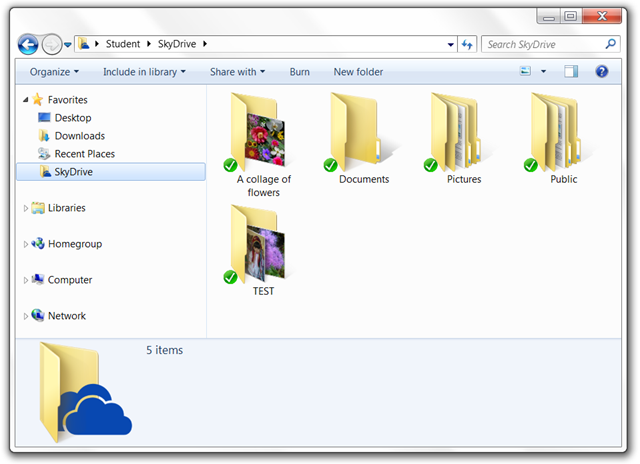
Here are some screen shots showing the SkyDrive folder before some folders were removed from syncing and after, as well as the – unaffected – online SkyDrive.

SkyDrive-sync-07

SkyDrive-sync-09

SkyDrive-sync-10

.:.

© 2012 Ludwig Keck

LiveWriter-credit-360

How do I import just certain photos from my camera to my computer?

Microsoft Photo Gallery provides a very flexible import tool. For the easiest way to use this tool, first set up your computer to launch it when you connect your camera. Check this post for instructions on setting up your computer: How do I import photos from my camera to my Windows 7 computer? 

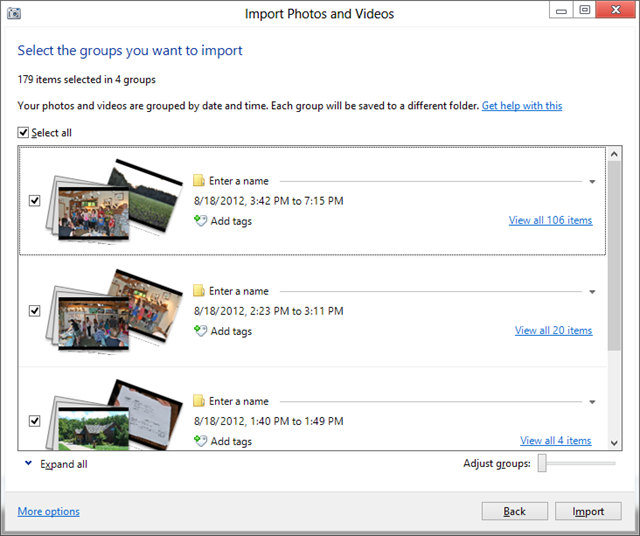
To specify just the photos that you wish to import use the options in the import dialog. When the dialog opens the photos on your camera are shown in groups by the time/date the photos were taken. Import-09The groups that you have not yet imported are checked. Note the Select all option above the listings.

Click this several times to select all or to unselect all. You want them all unselected.

If you do not want the imported photos to be placed into multiple folders, adjust the Adjust groups slider all the way to the right. You will see the results in the main area.

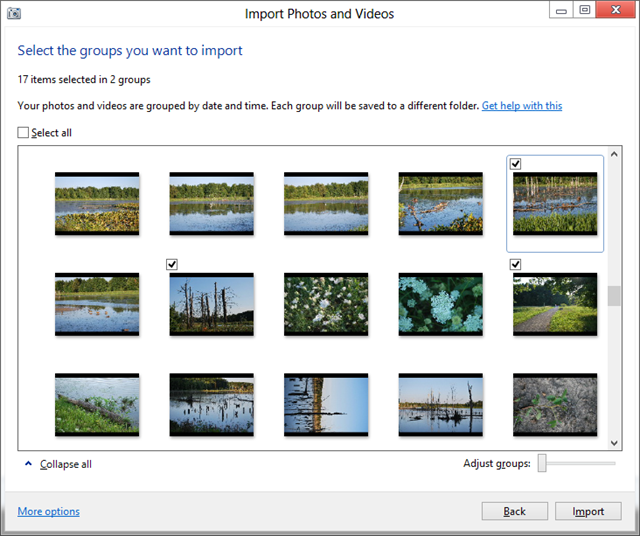
Click the View all xx items link on the right of the listing to show thumbnails of all photos.

Now proceed through the thumbnails and select the photos you wish to import. Selecting works just as you expect. Click to select, click again to unselect.Import-14 

Note that the number you have selected is shown. You may have to scroll down and up if there are a lot of photos on your camera.

When you have made your selections click Import to complete the task.

.:.

© 2012 Ludwig Keck
LiveWriter-credit-360